Mar 31, 2010

Welcome to My World!

After three months of transporting, rearranging and organizing, I think I'm finally ready to unveil my scraproom. It's still kind of a work-in-progress, but if I waited until it was completely finished...well, you'd probably never see it.

So without further ado, here's a peek into my scrap space.

image

The pinstriped walls are a holdover from my daughter's nursery (which I took over in December). It was such a pain to paint them this way that I can hardly bear the thought of repainting.

This is my die-cutting and embellishment area. I repurposed the changing table from the nursery -- turns out it's a perfect storage piece! The larger drawers are great for holding tools, die sets and layouts to be filed. One of these days, I'll get around to mounting the embellishment center on the wall, but I haven't gotten up the nerve to ask DH to help me. (Yes, I'm a wimp.)

image

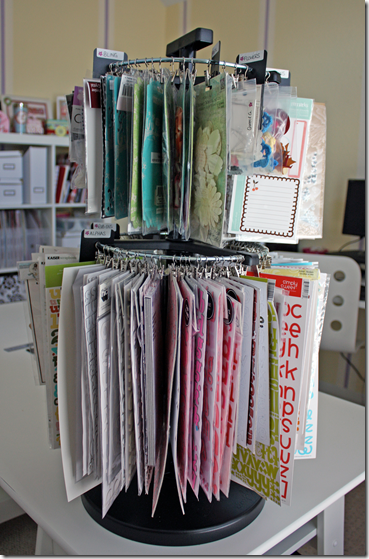
And this is one of my two (for now) Clip It Up units. This one holds Thickers, other alphas and rubons on the bottom tier and acrylic stamps and smaller packaged embellies on the top. I like that it sits on the corner of my scrap table so all my alphas are within reach when I'm working on a layout.

image 

This is my Expedit shelving from IKEA, and I'm amazed at how much it holds. In addition to my albums and idea books, I keep patterned paper (organized by manufacturer), chipboard shapes and alphas and sewing supplies. Large storage boxes hold page kits, page protectors, alterable items and scraps. My altered projects are displayed along the top.

image 
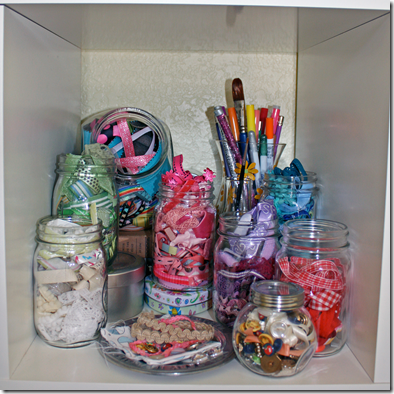
One cubby holds several jars of ribbon (separated by color), plus markers and paintbrushes. Admittedly, it's not the most organized way to keep ribbon, but I love the look of the jars with the different colors and patterns inside.

image

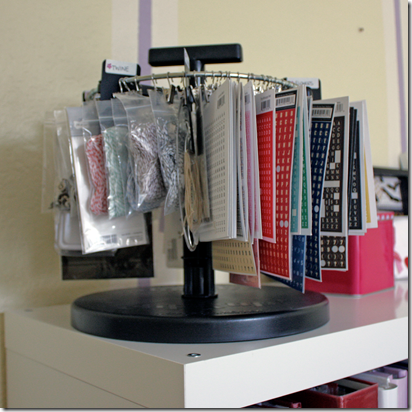
And this is my other Clip It Up -- a mini! It holds smaller embellishments like mini alphas, twine, brads and bling. It sits on top of my Expedit so it's at eye level for easy "shopping."
image 
The Clip It Up products have been incredibly helpful in putting this room together. I used to keep all my products in various shoeboxes with very little rhyme or reason. I could never find anything when I needed it, and there were tons of things I completely forgot I had because they got buried in the clutter. It's so refreshing to be able to see everything I have, and it inspires me to use more variety in my layouts because I can easily find things that go together.

Hope you've enjoyed this little journey inside my space. For more ideas and inspiration, visit my blog

(http://dreaminginscraps.blogspot.com).
Robyn Schaub

Mar 29, 2010

Quote of the Week

“You’ve got a lot of choices. If getting out of bed in the morning is a chore and you’re not smiling on a regular basis, try another choice.”
― Steven D. Woodhull

Mar 26, 2010

Altered Egg Holder

Here is my first blog post at Simply Renée Clip it up!! How cool is that!

It’s my turn to show you an altered item. Lately I bought an egg holder, and my scrappy mind said to me….  “This is perfect for altering!!”

image And yes, It’s real cute on my Easter table with eggs from my own chickens!

Maybe you could find something like my egg holder. I smeared it with gesso, and when all is dried, I sprayed Tattered Angels Glimmermist on it and covered the circle with the egg holes in it with patterned paper…add some flowers vines, and that’s it!

image

image

image

Wishing you a very Blessed Easter!

Wendela

Mar 24, 2010

Flower Power for Boys

I have never thought that flowers are only for girls. I always believe flowers work well with boys as well and it definitely does not make them sissy. My obsession with flowers does not make me wish that I have a girl instead so I can make pretty little stuff for her. In fact, I created lots of projects and layouts using flowers for my hubby and son and I think they look wonderful!

With the release of an awesome huge range of new collection from Prima Marketing, I practically wiped off the shelf in my local scrapbooking store! Lol! The moment I laid my eyes on them, I knew I had to add them to my existing collection of Prima stuff.

I’d love to share with you a page that I’ve created using lots of yummy Prima goodies from the new 2010 Winter collection. I cut out part of the flourishes from the Shabby Chic “Grape Twilight” paper and adhered it onto a white cardstock at the bottom right corner of the page.

image

I then cut out a frame from Hambly Studio “All Mixed Up” overlay , inserted it below a picture of my boy, which was matted with maroon color cardstock. I also cut out the flower flourish from the Raspberry Tea “Peach Cobbler” paper and layered them under the picture.

image

I created layers of flowers and leaves on the left side of the picture to add some texture to the layout.

image

Next, I added some crystal from “Say It With Crystal* to the top right corner of the picture, which adds a little more dimension to the layout.

image

I completed this layout with a clutter of more flowers, leaves and crystal at the bottom right corner of the picture. The title “Precious” is from the Shabby Chic Journaling Chipboard

image

And voila! Here’s the finished layout with lots of beautiful Prima products……flowers, leaves, crystal and papers……..a feminine touch but still works perfectly for a boy.

image

Don’t be afraid to use flowers for boys or men layouts, they will look great!

Leena

Mar 23, 2010

More Fans, More Savings!!!

We're featuring a one day sale on April 15th, 2010 and the discount depends on YOU!!! Here's how it works- Become a FAN of Simply Renee Inc on facebook (click here) and then invite all your friends and ask them to become fans. The more fans the more savings!!! If you're already a fan then just invite others!!!

If we get 500 Fans ...you'll receive a 30% discount
If we get 750 Fans you'll receive a 40% discount
If we get 1000 Fans you'll receive a 50% discount

The Coupon Code will be posted on our facebook page by midnight April 14, 2010. The code will be valid for 24 hours only and will be off your ENTIRE purchase on our website (www.clipitup.com).

Plus...to add to the excitement. Over the next few weeks we'll have random drawings and all you have to do to enter is become a fan!!! Make sure you check our page to see if you're a winner and to receive the coupon code for the sale on April 15, 2010.

Mar 22, 2010

Quote of the Week

“I try to take one day at a time, but sometimes several days attack me at once.”
― Jennifer Yane

Mar 19, 2010

Ribbon Bliss

I never really knew how much ribbon I had until it became organized.  Before I had ribbon in jars, on rings, hanging from the slat wall, and wrapped around clothespins. I couldn’t tell how much of any particular ribbon I had, never mind if there were doubles of anything. Pile on top of that, I’m a very visual artist, and I am inspired by seeing my supplies. Having it in so many different spots wasn’t helping my creative mojo one bit.

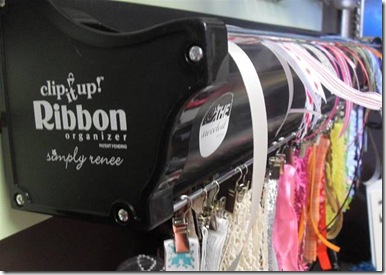
Then, like out of an organizational gurus mind, the 36” Ribbon Organizer, gave me the answer to make all my ribbon come together.

clip_image002

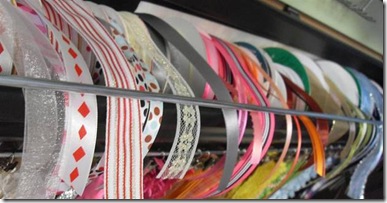
From whites to blacks and everything in between, my ribbon is now visible and easy to get to. All of my spools are located nicely in the top basket of the Ribbon Organizer. I was amazed at how many spools could actually fit in the top.

clip_image004

Any smaller pieces or unspooled snippets are arranged on the bottom rod using the clips provided. For more delicate ribbons and trims, the Clip Grips are a wonderful addition and protect those things like crochet and silk.

clip_image002[1]

All in all, I think the Ribbon Organizer was the best invention for keeping those beautiful ribbons and trims organized and in sight. I’m all about an organized space and this has both done that and given me extra space for other products. Now I just gotta get the Ribbon Organizer Attachment!!!

clip_image004[1]

Hope you are all having a fantastic week so far. Spring is right around the corner and I just can’t wait

Toodles

Erika Taylor

Mar 17, 2010

Creating Layouts with Dimension by: Keely Yowler

Do you ever look at a layout and wonder how they get all of that dimension?  How do they create those clusters of embellishments?  Today, I want to share with you my tips for creating layouts with dimension.

First, I choose a paper collection with lots of detail, color, and pictures I enjoy.  I have chosen to work with the Le' Romantique Collection from Graphic 45.  I'm a vintage girl, so this really appeals to me.  You could easily create these layouts with any grouping of papers you like.

I chose this patterned paper to use as my border.  I simply, tore the inside of the paper away leaving a rough edge border.  I then inked the edges for dimension.  Don't adhere the border yet.

Next, I chose a simple patterned paper for the inside of the frame.  You want a pattern that will not compete with your embellishments or be too distracting.  We will be using lots of different patterns on this layout.  Adhere this patterned paper to the center of the background cardstock (I chose pink cardstock).

Adhere the border with Pop-dots.  This gives the layout a raised, framed look.  I glued lace under the edges of the border.

Cut various shapes and images from the patterned paper.  This beautiful collection had butterflies, roses, frames, and a vintage, blushing bride.  Adhere the larger images flat on your layout.  Adhere smaller pieces with Pop-dots.

Create flowers with matching patterned paper by layering various sizes of circles.  Crinkle each circle before stacking, ink edges, and secure with a brad in the center.

Create leaves with matching patterned paper with a heart punch.  Ink edges.  Bend in half and ink center line.  Leave slightly bent and glue under flowers.

Create other accents by rolling matching patterned paper around a pencil for a swirl.  Sand and ink chipboard letters.  Accent with smaller sticker letters.

There you have it...A true dimensional layout.  I hope you enjoyed my tips today.  I would love to see what dimensional projects you create. 

Keely Yowler

Mar 15, 2010

Quote of the Week

“Breathe. Let go. And remind yourself that this very moment is the only one you know you have for sure.”
― Oprah Winfrey

Mar 12, 2010

How I altered my Clip It Up Mini

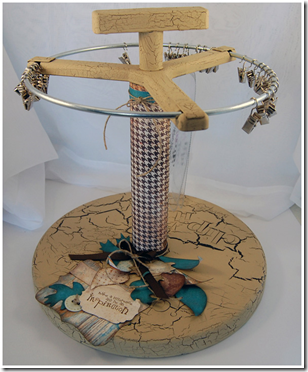
Hi! I'm Angela Fehr and I'm excited to be sharing my altered Clip It Up Mini with you!  I'm a real vintage lover, and my dream is to decorate my studio space (which my husband is building for me this year!) like an old general store, chock full of color and antique flair.  So the first thing I did with my Clip It Up Mini was to antique it a bit, using crackle paint.

image

First, I sprayed the base and the top of the unit with 2-3 coats of matte chocolate spray paint (mmm! chocolate!). This is the color that will show through the crackled top coat. I brushed on a thick coat of crackle medium (I used Folk Art brand) and allowed that to dry.  The thicker the crackle medium, the larger the cracks.  After the crackle medium was thoroughly dry, working quickly, I brushed on a layer of DecoArt Americana acrylic craft paint in Desert Sand.  Crackle medium directions and results vary by brand and technique, so practice first if you are new to crackle medium.

You notice I left the center spindle unpainted. I covered it with paper instead!

image

I cut a sheet of my favorite patterned paper to 6" x 9", inked the edges and added a cute border along the top. I wrapped it around the spindle and hot glued it along the seam.  It's not actually glued to the spindle so I can change the paper if my decor changes.

image

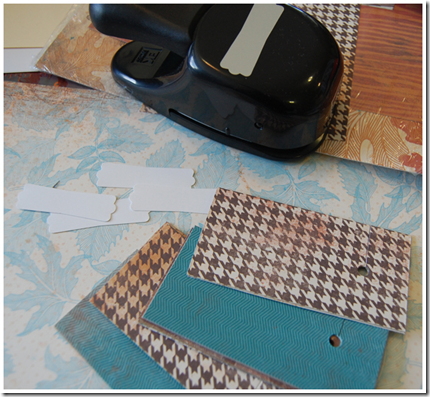
I wasn't sure how much of the base would be visible after I'd loaded my Clip It Up Mini with all my stamping stuff, but I still had more of that favorite paper pack to use (Stampin' Up! Autumn Meadow), and so I took out my Sizzix Big Shot and made some die cut leaves and label shapes to layer on the base.  After die cutting, I stamped an inspiring quote on one shape (Stamp from Unity Stamp Co.) and inked the edges of the leaves.

image

The finished Clip it Up Mini is almost too pretty to use!  But using it was what I'd been waiting for.
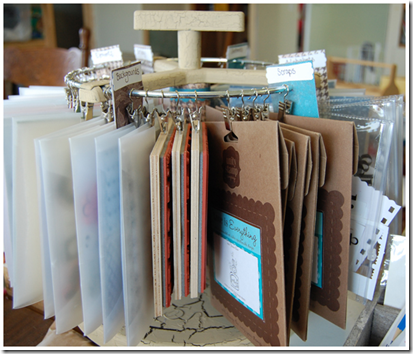
I loaded it with all my stamps - and I do mean ALL - all of my acrylic mount stamps fit on there with a little room to spare.

image

image

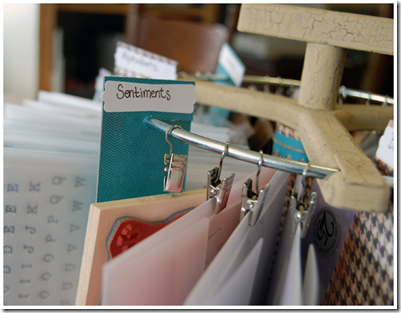
The best part of this whole alteration job is that you are only limited by your imagination - try altering your Clip it Up using your favorite paper and paint hues!  Or start small and make your own custom divider cards to better label your stash.  And don't forget to show us your results!

image

Angela Fehr
http://scrapsfrommytable.blogspot.com

Mar 10, 2010

Material Girls

We visited Material Girls, an adorable quilt shop in South Jordan UT, and had the wonderful opportunity to speak with the owner Nadine.  She is the cutest lady and if anyone lives nearby they HAVE to stop by and say Hi!!!  You will love her store even if you’re not a sewer or a quilter. 

Nadine has 5 Clip it Ups in her store and all she will say about them is “I totally love, love, love them!!!” She uses them as her displays.  She puts patterns and quilt kits on them.  Look at these pictures and see how fun her store is and how great the Clip it Ups work as displays!!!

Simply Renee is just starting to venture into the Quilt Market and we’re meeting so many wonderful people like Nadine.  I LOVE scrapbooking but I may just have to venture into some quilting in my free time (LOL).

Simply Renee

Michelle’s Creative Space

Jealousy is a horrible thing. But I have to admit - I am so jealous of all those fantastic pictures I see all over the blogosphere of some craft rooms. An entire room for papercrafting, giftwrapping, all that fun creative girly kinda stuff. Jealous. For sure. I see brilliant, clean and colorful organizations and I just swoon over them.
 
Unfortunately for me, we live in a teeny tiny house. We don't have an extra room that I can have just for me. So I've had to make do. I found this little spot in my bedroom for a craft table. My husband put up shelves, lights, a tall cupboard, a shoe hanger for my punches and now we are sleeping in my craft room *giggles* But hey - you gotta do, what you gotta do.
 
One issue I have struggled with for the longest time is ribbon storage. I buy tons of Papertrey Ink ribbon because it coordinates with my cardstock, inks and buttons, but I don't have a good storage solution for my ribbon which has been really frustrating for me.
 
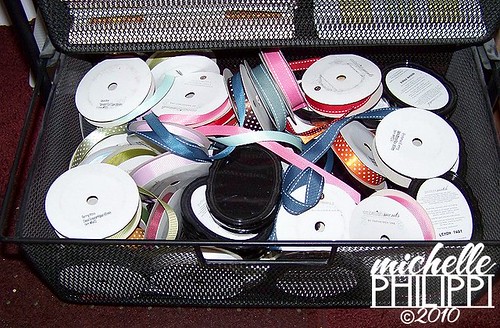
I have this rolling cart under my craft table where I house the opened packages of cardstock, PTI patterned paper, and my inks and ribbons. This is where I have my open ribbon spools - what a mess; inks and ribbons in one drawer. Sad.
 
ClipItUpRibbon1
 
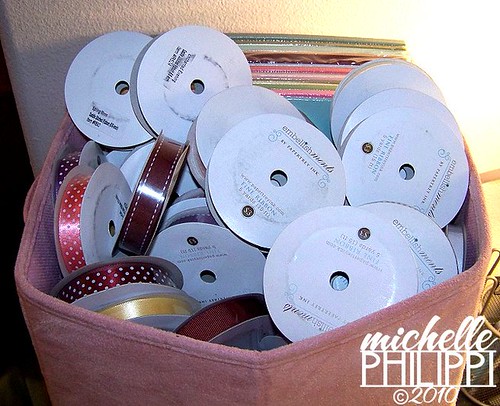
Then I have this box on the side of my craft table which houses new/unopened packages of PTI cardstock and ribbon. The obvious problem: I can't see what I have. Out of sheer convenience, when I am making a card, I just reach for whatever I have open and maybe I don't have a color or a style there that would go better on my card and I miss out on something that could coordinate better.
 
ClipItUpRibbon2
 
And now my problem is solved. The 36" Clip it Up! ribbon organizer from Simply Renee is exactly what I needed. My husband put it up for me, right over my craft table and it's just about the entire width of my area which is perfect. I took all my open ribbons and loaded them up in the ribbon organizer. And, the ribbon organizer even comes with these great little clippees to hang ribbon or other things that you need to reach for - I've got my fancier Couture ribbon from Papertrey Ink and my beloved sheer ribbon from May Arts hanging down here - if I don't think about it, and I don't see it, it's forgotten and pretty ribbon is a terrible thing to waste.
 
ClipItUpRibbon5
 
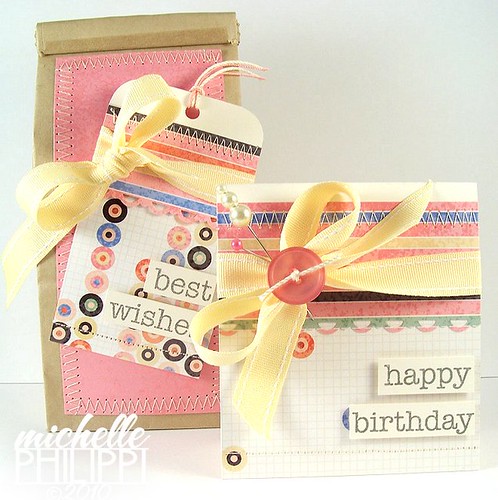
Oh and hey - did you wanna see something I made? Here's a cute lil' card and gift bag set I made with some fun papers from GCD Studios. My stamps are by Hero Arts, those great pins are from Maya Road (pearlized) and Dritz (pink), and I added some fun stitching because I love the warm, homemade feel stitching gives to a project.
 
HBSet_GCD_02_03_10
 
I hope you've enjoyed this little peek in to my creative space. I used to be so ashamed of my little crafting area, but you know, if you love your craft, if you enjoy your hobby, make it work for you - and most of all: have fun!
 
TTFN!

Mar 8, 2010

Quote of the Week

“Anything I’ve ever done that ultimately was worthwhile...initially scared me to death.”
― Betty Bender

Mar 5, 2010

Valerie’s Craft Room

My crafting space is an open loft area, and while it may not be my
"ideal" space, I have worked the area to fit my needs. I would like to show you my favorite things, and how they help keep me organized!

image

The Clip It Up base unit and upper tier has really transformed my
scrapbooking area. I have ALL of my embellishments hanging on this unit. And let me tell you- I have got lots of embellishments! I like to pull all my elements of a scrapbook page together before I begin, so I can easily go to this area and "shop."

image 

I have this great metal storage unit that holds my die cutting
machine. The top drawer holds paints and mists, while the bottom half has mini books and alterable items in it.

image

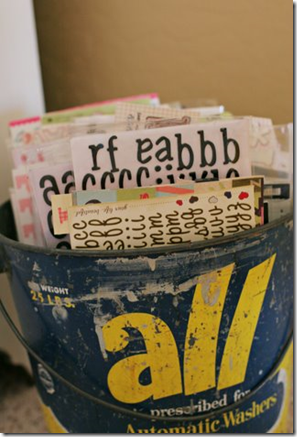
I keep a few of my ribbons on these vintage spools. While I don't use these ribbons too often, it adds some interest to the area.

image

My paper hangs high on metal shelving using clips from the Clip It Up system. My children seem to really enjoy playing with all the pretty paper, so I had to put them out of reach up high!

image

Here are a few more vintage finds that I have worked into my scrapbooking space.

image

image 

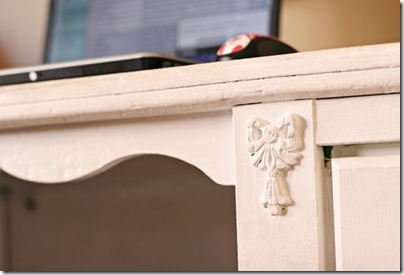
This is where my computer sits. This desk was found at Goodwill for three dollars. It was an awful bright green, so I painted white and added new hardware.

image 

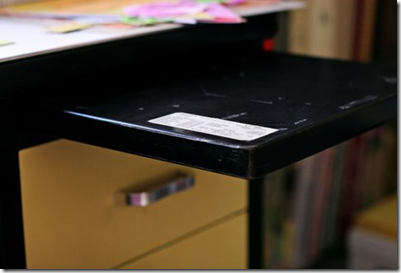
The second desk in my area might me my absolute favorite thing. It is a huge vintage metal desk that gives me a nice space for crafting. It even fits my sewing machine on it. And as a bonus- there is a pull out surface that fits my 12x12 layouts perfectly. So I can put my project over there if the desk is needed for something else!

image

Lastly, my printer cart holds the kids art supplies, embroidery
thread, and other miscellaneous goodies.

Thanks for visiting my craft area!

Valerie Allen

Related Posts Plugin for WordPress, Blogger...